Thursday, December 26, 2013

Christmas Craft

I have become a fan of Pinterest. There are so many cute ideas and things to find on that website, and I find myself just pinning away sometimes! Right before December I found this very cute idea of how to make a very unique ornament that is easy, not very expensive, and also has a rustic feel to it! I also found a new blog that I've started to follow. You can see her instructions hereMamie Jane's is an awesome place to find ideas on how to decorate using items you just might have on hand, or can easily find! Anyway, take a peak over at her blog to see what she has going on. For those of you that just want to see what I made and how to make them, continue on reading! 

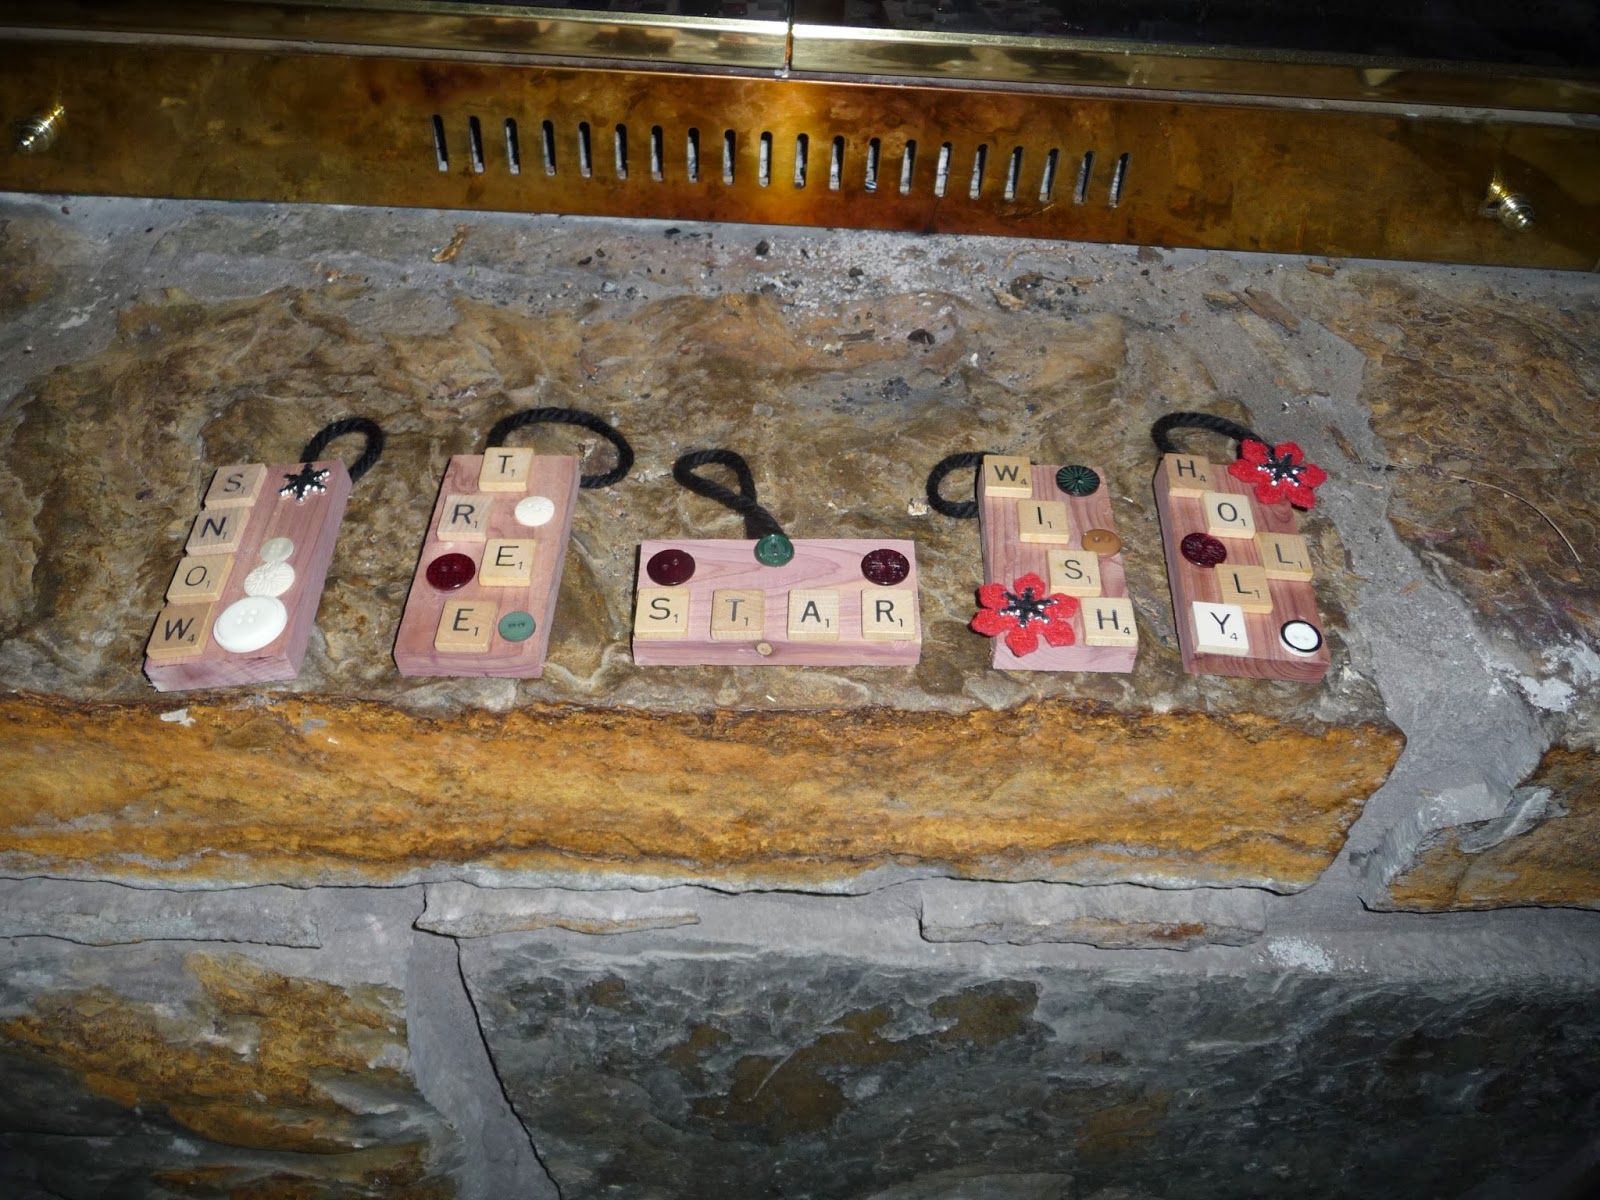
A look at the finished products.
The original blog used a few different materials, which I either didn't have, or decided not to use. Here is a list of materials that you will need to use. 

Gathered Supplies
You will need:
 Glue (I used Aileen's Tacky Glue, but white glue would probably work too)
 A bit of thick yarn
 A Staple Gun
 Embellishments (I used buttons and stick on snowflakes)
 Scissors
 Letter Tiles (I bought a big lot of Scrabble tiles on Ebay, or you can go to your local craft shop and they sell them in their wood section)
 Small blocks of wood (I cut mine to 2x4 inches, however Mamie Jane's blog used old rulers cut to the proper size)
 Sandpaper

I used some scrap cedar we had left over from a previous house project as my wood block.
If you are using a wood block like I did, check your block for the smoothest side. I used rough cut cedar wood that was left over from a project and the one side was rougher than the other. If there was a little roughness on the smooth side where I didn't want it I just sanded it a little with the sand paper. 

Staple the yarn, to the back of the wood block.
Take the yarn and cut a piece about five inches long, then fold in half and staple to the back of the wood. I also put a knot at the end of my yarn to help reinforce it with the staple. 
 
Use the sandpaper on the back of the letter tiles.
Because the Scrabble Letter tiles are smooth and shiny on the back I used a little bit of sandpaper to help it adhere to the wood better with the glue. You don't have to sand a lot, just enough to get the varnish off. 

Place a small dab of glue on the letter tile
Before you start gluing, you might want to place your letter tiles and embellishments where you want them to make sure they will fit right. With the size block I used the most letters I could get on the block was five, and that was squishing them together very close. By checking the placement before you glue you save yourself a lot of headache, trust me on this one! Using your glue, whatever type you decide to use, place a small dab of glue on the back of the letter tiles. Then place the tiles where you would like them. Once your letters are in the spot where you need them you can then glue on your embellishments. I used buttons and snowflake stickers, but there are so many options in the craft store, so go crazy, or not... LOL!

Finished Project!
When you are done, you have a cute, special ornament that you can hang on your own tree, or make a bunch and give them to friends and family! A few of mine will be going to some of my family back in PA!


Well I hope you enjoyed the craft, and maybe you'll have something special you did this year to share with me. If so, leave a comment, I love new ideas. Hope you all had a very Merry Christmas, and that the New Year will bring many blessings to you and your family!